Dr.Web Security Space 9.0 will automatically update to version 10.0
Hot news | All the news | News on Dr.Web products | News on update
February 17, 2015
With the revamped mini-agent, upgraded Data Loss Prevention configuration routines, Parental Control, and other anti-virus features, controlling Dr.Web has never been easier.
Please note that all your settings will be saved through the upgrade except the following parameters:
- Anti-virus network password (Dr.Web 10.0 will enable you to generate a password automatically);
- Your blocked devices;
- The Parental Control list of blocked files and directories.
Please note that the Dr.Web 10.0 interface has been redesigned, and the grey system tray icon now indicates that the anti-virus is working properly.
The update will be performed automatically; however, a system reboot will be required. However, if the anti-virus is updated via the Global Updating System, Dr.Web Anti-virus 9.0 won't be upgraded. But, if an update mirror is used, this product will also get updated to version 10.0 (if the mirror is created in Dr.Web Security Space).
Owners of Dr.Web Anti-virus licenses can take part in the Dr.Web Security Space free migration promo and upgrade from the basic security software to the product that provides comprehensive protection.
Blocking access to hardware
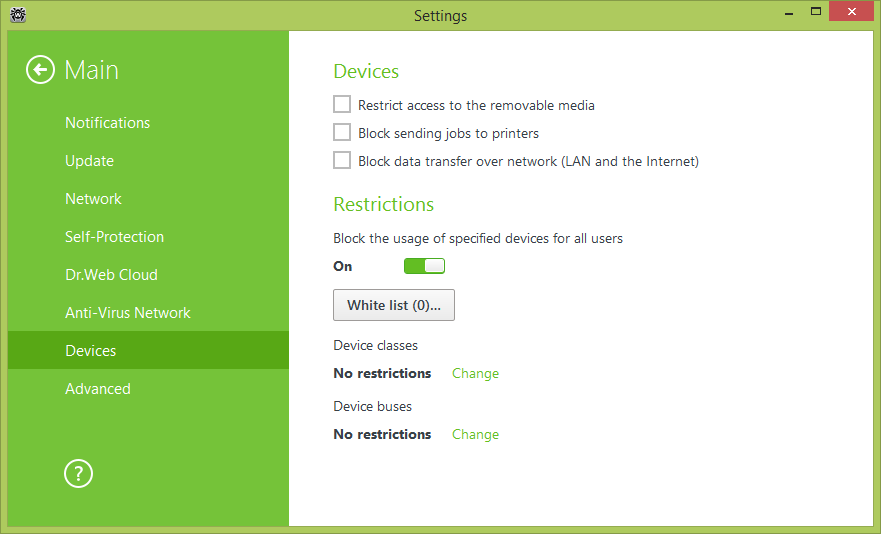
- Open the mini-agent, and click on the lock to toggle on the administrative mode.
- To open the configuration window, click on the gears button.
- In the configuration window, go to Main - Devices.
- Set the required restrictions on the use of devices or the transmission of data over the network.
Configuring Parental Control to block access to files and directories.
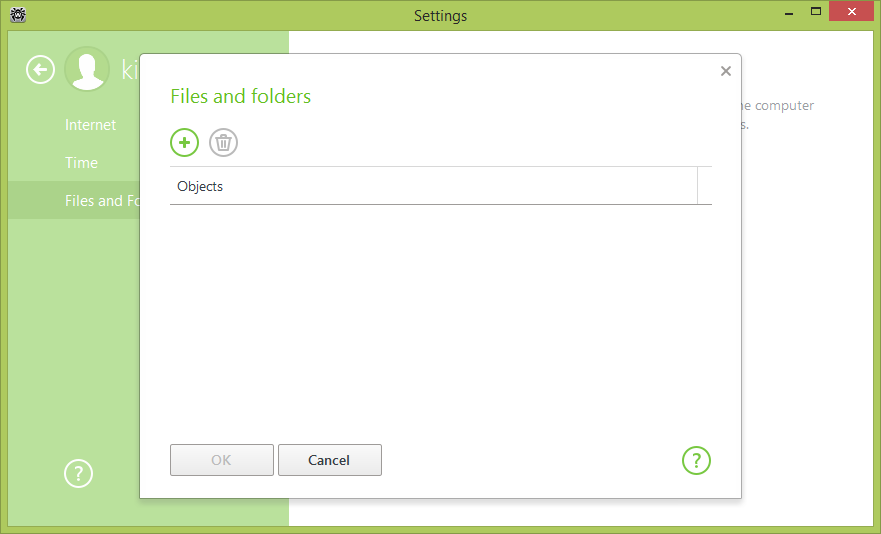
- Open the mini-agent, and click on the lock to toggle on the administrative mode.
- Click on the gears button to open the settings.
- In the settings window, go to the Parental Control section.
- Select the Windows account on which you want to impose restrictions.
- In the Files and Folders section, press Change.
- Press the Objects button The Files and Folders window will open.
- Press "+" to add paths to the files and/or folders to which you want to block access.
- Then in the Files and Folders window, press OK.